Storytelling has always been at the heart of great content, whether it’s a short clip for social media, a brand video, or a personal project. The difference between an ordinary video and one that captures attention often comes down to editing. With CapCut Desktop Video Editing Software, creators of all levels have access to professional-grade tools designed to make stories shine. What makes CapCut Desktop stand out is how it combines a user-friendly design with powerful features. You don’t need years of editing experience to create videos that look polished, flow smoothly, and keep audiences hooked. Let’s explore why this tool is ideal for storytelling and how you can use it to craft videos that leave a lasting impact.
Why Storytelling Matters in Video Editing
Videos are more than just visuals strung together. They are experiences that communicate feelings, ideas, and messages. A good story builds curiosity, creates emotional connection, and encourages viewers to stay until the very end. However, storytelling in videos doesn’t just rely on the script or concept—it relies heavily on editing. Transitions, pacing, effects, sound, and visuals all come together to guide the audience through the story. This is where CapCut Desktop makes the job much easier for creators.
CapCut Desktop Editing Features That Hook Viewers
Here are some of the standout features that make CapCut Desktop a great choice for storytellers:
1. Intuitive Timeline Editing
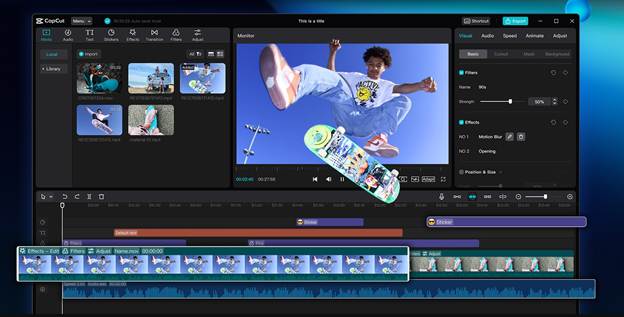
CapCut Desktop Video Editor offers a drag-and-drop timeline that makes it simple to arrange clips, trim unnecessary parts, and add effects. The clean layout ensures that even beginners can easily manage multiple layers of video and audio, allowing for smooth and professional storytelling.
2. Transitions that Enhance Flow
A story loses impact if the cuts between clips feel abrupt. CapCut’s wide range of transitions ensures your narrative flows seamlessly. From smooth fades to dynamic motion effects, transitions help you control pacing and maintain audience attention.
3. Text and Subtitles for Clarity
Text tools are essential for storytelling, especially when you want to emphasize dialogue, highlight key points, or make content accessible to a wider audience. CapCut allows you to add stylish subtitles, Voice Changer, captions, and animated text that keep viewers engaged.
4. Sound Effects and Music Sync
Sound is a powerful storytelling tool. With CapCut, you can add background music, adjust audio levels, and insert sound effects that bring scenes to life. Whether it’s suspense, excitement, or emotion, audio editing helps set the mood.
5. Filters and Color Grading
The look of your video often determines how viewers feel about it. CapCut Desktop provides filters and color adjustment tools to create the right atmosphere—warm tones for nostalgia, cool tones for suspense, or vibrant colors for energy.
6. Creative Stickers and Overlays
Sometimes, a fun sticker or creative overlay can enhance your story. CapCut also has an Online Photo Editor that includes a library of stickers, effects, and overlays that make videos visually exciting without being overwhelming.
7. Exporting in High Quality
Good storytelling loses its magic if the final video is blurry or pixelated. CapCut supports high-resolution exports so that your work looks crisp on any platform, whether it’s TikTok, YouTube, or Instagram.
How to Use CapCut Desktop for Storytelling
If you’re ready to turn your ideas into captivating videos, follow this simple guide:
Step 1: Build the Foundation of Your Story
Start by importing your clips, audio, and images into CapCut Desktop. Place them on the timeline in the order that matches your story’s beginning, middle, and end. Trim unnecessary parts so the pacing feels smooth. At this stage, think of yourself as laying the foundation of a house—keeping it clear and structured ensures everything else falls into place later. Arrange clips logically to reflect the narrative. Trim dead space or irrelevant footage. Use markers to highlight important story moments.
Step 2: Enhance with Effects, Text, and Audio
Now that your structure is set, it’s time to make the video engaging. Add transitions between clips to maintain flow. Insert text or captions for clarity, especially if your audience is scrolling without sound. Layer in background music and sound effects to set the mood. Use smooth transitions to avoid abrupt jumps. Add animated text to emphasize key points. Balance audio so dialogue is clear and music isn’t overpowering.
Step 3: Polish and Finalize Your Story
The final step is about fine-tuning. Adjust color grading to create the right mood. Add overlays, stickers, or filters to match your style. Watch the video multiple times to ensure pacing feels natural and nothing feels out of place. Finally, export your video in high resolution so your story looks professional wherever it’s shared. Apply consistent color grading for mood. Check audio levels for clarity. Export in HD or 4K for the best results.
Conclusion
Storytelling is the backbone of every memorable video, and with CapCut Desktop Video Editor, you have everything you need to bring stories to life. From smooth transitions and text animations to music, effects, and color grading, this tool helps creators shape narratives that keep audiences engaged. By following a clear process—structuring your story, enhancing it with effects, and polishing it before export—you can turn raw footage into a video that hooks viewers from start to finish. Whether you’re a content creator, business owner, or just someone who loves sharing stories, CapCut Desktop is your partner in creating videos that connect, inspire, and entertain.